
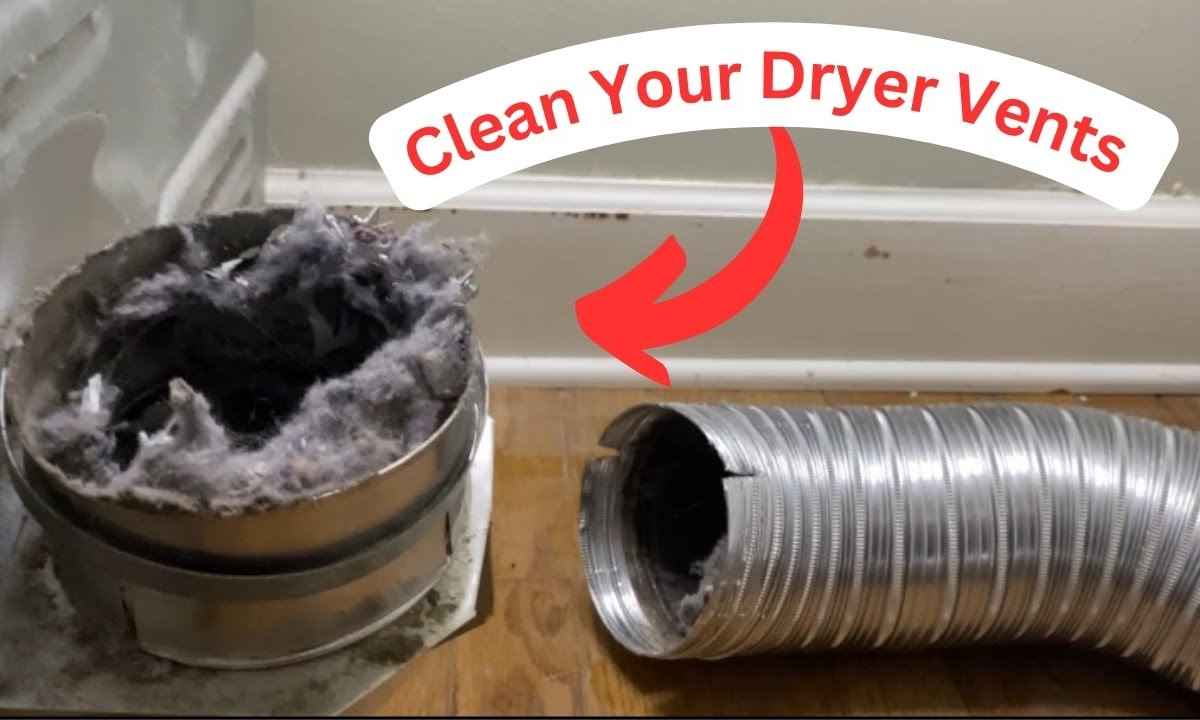
Every year, clogged dryer vents cause nearly 2,900 house fires across the United States. That’s not a scare tactic. That’s a fact from the U.S. Fire Administration. Most of those fires were entirely preventable.
If you can’t remember the last time you cleaned your dryer vent, this guide is for you. You’ll learn exactly how to do it safely, what tools you need, and when to call a pro.
Why Cleaning Your Dryer Vent Is Important
Lint is deceptively dangerous. It’s soft, it’s fluffy, and it ignites fast. When lint accumulates inside your vent duct, it doesn’t just sit there quietly. It restricts airflow, traps heat, and creates the perfect conditions for a fire.
Beyond fire risk, a clogged vent makes your dryer work twice as hard. That means longer drying cycles, higher electricity bills, and a machine that wears out years ahead of schedule. For gas dryer owners, there’s another concern: blocked vents can trap carbon monoxide inside your home. That’s a serious health hazard most people never consider.
Signs Your Dryer Vent Needs Cleaning
Don’t wait for smoke to tell you something’s wrong. Your dryer gives plenty of earlier warnings.
- Clothes take two or more cycles to dry fully
- The dryer or laundry room feels unusually hot
- You smell something burning during a cycle
- The vent hood flap outside doesn’t open when the dryer runs
- Visible lint builds up around the exterior vent opening
- Your last cleaning was over 12 months ago
Any one of these signs is a reason to act. Two or more? Stop using the dryer until you’ve cleaned the vent.
Tools Needed to Clean a Dryer Vent
Good news. You don’t need fancy equipment. A basic cleaning kit gets the job done well.
| Tool | Purpose |
| Dryer vent brush kit | Loosens and removes lint from inside the duct |
| Vacuum with hose attachment | Sucks out loosened debris |
| Flathead screwdriver | Removes vent cover screws |
| Flexible extension rods | Reaches deeper into longer duct runs |
| Work gloves and dust mask | Protects you during cleaning |
A quality brush kit costs around $20 to $40 on Amazon. That’s a fraction of what a service call runs. Skip the wire brushes though since they can shred flexible ducting and make the problem worse.
Step-by-Step Guide to Clean Dryer Vent Safely
Step 1: Disconnect the Dryer
Unplug electric dryers from the wall. For gas dryers, turn off the gas supply valve. Pull the dryer forward carefully, giving yourself enough room to access the back.
Step 2: Detach the Vent Duct
Loosen the clamp or peel back the foil tape connecting the duct to the dryer’s exhaust port. Gently pull the duct free. While you have it disconnected, inspect it for cracks, tears, or heavy crushing.
Step 3: Insert the Brush and Clean
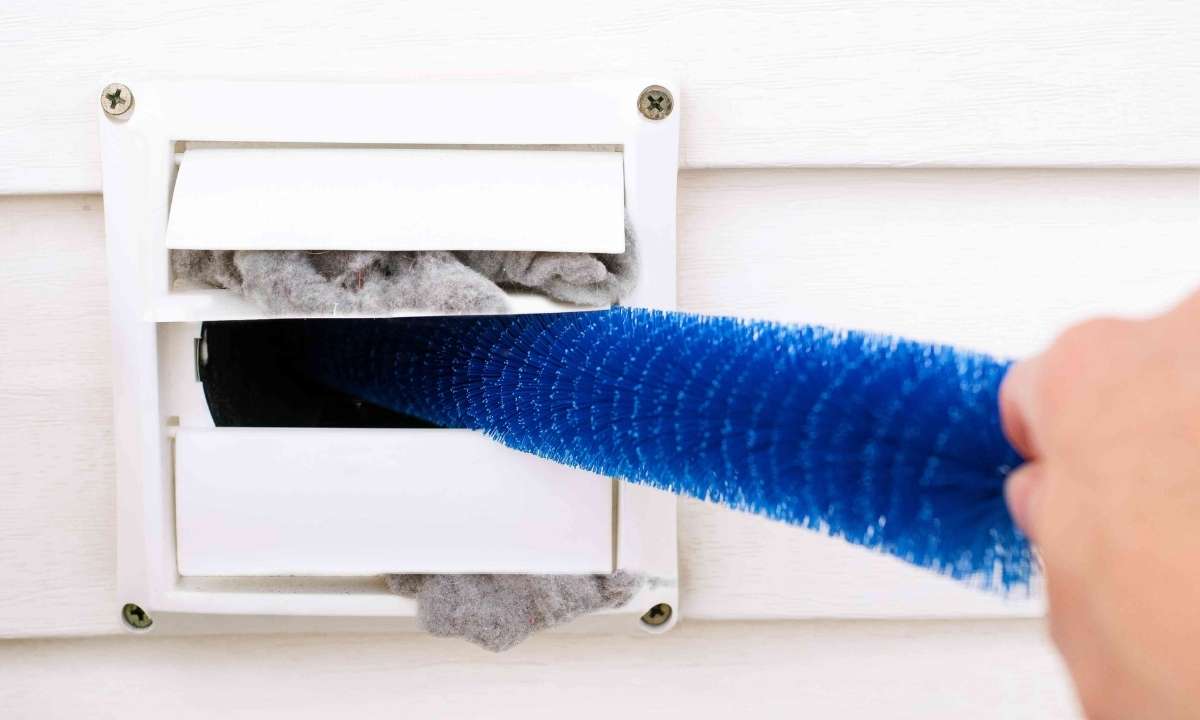
Feed the flexible brush into the duct. Use rotating, push-pull motions to dislodge lint buildup. Add extension rods as needed for longer runs. Work from the dryer end toward the exterior wall.
Step 4: Vacuum Both Ends
Vacuum out the dryer’s exhaust port thoroughly. Then vacuum the duct itself from both ends. Don’t rush this step. Leftover lint defeats the whole purpose.
Step 5: Clean the Outside Vent Opening
Head outside and remove the vent cover. Clear any lint, leaves, or debris. Check that the flap swings open freely. Bird nests inside vent caps are surprisingly common in suburban U.S. neighborhoods, so look carefully.
Step 6: Reassemble and Test
Reconnect the duct securely. Use metal foil tape, not regular duct tape, to seal the connection. Run the dryer on an air-only cycle for 10 minutes. Go outside and confirm warm air is flowing out of the vent.
How to Clean Dryer Vent from Outside
Sometimes working from the outside is actually easier, especially with long duct runs or awkward interior access. Here’s how.
- Locate the exterior vent cover on your home’s outer wall
- Remove the cover by unscrewing it or popping it free
- Insert the brush and push lint back toward the dryer
- Use a leaf blower to blast remaining debris outward
- Reattach the cover and confirm a tight seal
One important note: if your dryer vents through the roof, don’t attempt that yourself. Roof access cleaning is professional territory, full stop.
How Often Should You Clean a Dryer Vent?
The general rule is once a year for most American households. However, some situations call for more frequent cleaning.
| Household Type | Recommended Frequency |
| Average family (1-2 people) | Once a year |
| Busy family (4+ people) | Every 6 months |
| Pet owners | Every 6 months |
| Long or complex duct runs | Every 6 months |
| Commercial or shared laundry | Every 3 months |
A practical trick: tie your cleaning schedule to a seasonal event. Many homeowners clean their dryer vent every fall before heavy laundry season kicks in. Set a phone reminder and it becomes second nature.
Common Dryer Vent Cleaning Mistakes
Even well-meaning DIYers slip up. Here are the most frequent errors worth avoiding.
Using plastic accordion ducts is a major one. They trap lint in every fold. Rigid metal ducting is the safer, smarter choice and it’s not expensive to replace.
Only cleaning the lint trap is another mistake people make constantly. The lint trap catches maybe 25% of what your dryer produces. Skipping the duct is like wiping the kitchen counter and ignoring a grease fire on the stove.
Reconnecting the duct loosely is a third common error. A gap in the connection lets humid air leak into your wall cavity, which encourages mold growth. Always use proper metal foil tape and give the connection a firm tug to test it.
Benefits of Regular Dryer Vent Maintenance
Keeping your vent clean pays off in several real, measurable ways.
- Fire risk drops significantly with annual cleanings
- Drying time returns to a single, efficient cycle
- Energy bills decrease as the dryer stops overworking
- Appliance lifespan extends by several years
- Indoor air quality improves, particularly for allergy sufferers
- Humidity-related mold in laundry rooms becomes far less likely
A case study worth noting: the Consumer Product Safety Commission found that households that performed regular dryer maintenance reported 40% fewer mechanical failures compared to those that skipped it entirely.
When to Call a Professional Dryer Vent Cleaner
DIY works great for most homes. But some situations genuinely call for a professional. Call a certified dryer vent cleaner if your duct run exceeds 25 feet, makes multiple sharp bends, exits through the roof, or if you discover an animal nest blocking the line. Professionals use high-powered rotary brushes and commercial vacuums that reach places a standard kit simply can’t.
In the U.S., a professional dryer vent cleaning typically costs between $100 and $175. When choosing a technician, look for CSIA certification and check their reviews on Google or Angi before booking. Ask specifically what equipment they use and whether they inspect the duct for damage as part of the service.
Conclusion
Cleaning your dryer vent safely isn’t complicated but it matters enormously. A clogged vent is one of the most overlooked fire hazards in American homes. With the right tools and this step-by-step approach, you can handle it yourself in under an hour.
Do it once a year, watch for the warning signs, and call a professional when the job goes beyond what DIY can handle. Your home, your family, and your energy bill will all thank you.