
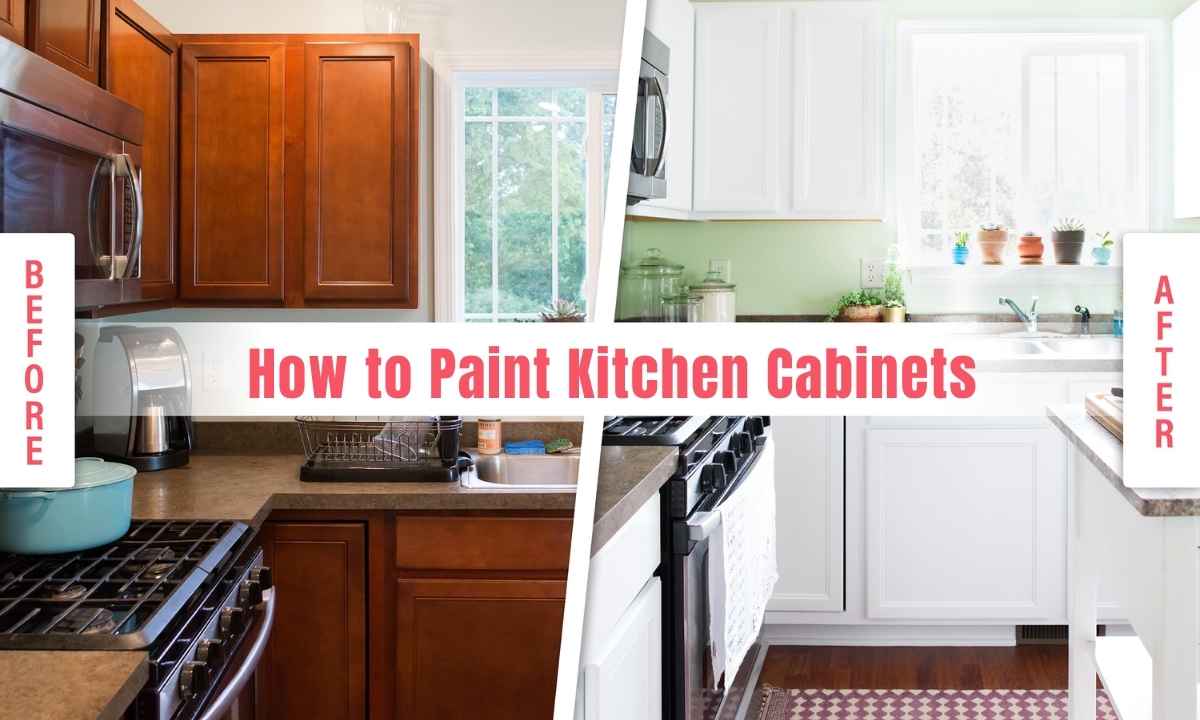
Painting your kitchen cabinets is one of the smartest home improvement moves you can make. It costs a fraction of what new cabinets would run you, and when done right, the results look just as good. A fresh coat of paint can completely change the feel of your kitchen without a full renovation.
Whether your cabinets look dated, worn, or just need a color update, this guide walks you through every step to get a smooth, durable, professional-looking finish.
What You Need Before You Start
Having the right supplies ready saves you trips to the store mid-project. Here is a quick checklist:
Tools and Materials:
- Screwdriver (for removing hardware and doors)
- 100 to 150-grit sandpaper (for initial scuff sanding)
- 220-grit sandpaper (for sanding between coats)
- Tack cloth or lint-free rags
- Painter’s tape
- Degreaser or TSP cleaner
- High-adhesion bonding primer
- Cabinet-grade paint (acrylic enamel or alkyd hybrid)
- Angled paintbrush (for detail work)
- Mini foam roller (for flat surfaces)
- Wood filler or putty (for holes and dents)
Is Your Cabinet Worth Painting?
Before spending a weekend on this project, take a close look at your cabinets. Painting works best on solid wood or MDF cabinets that are structurally sound. If the doors are warped, the hinges are broken, or the particleboard is sagging, paint will not fix those problems. A thorough refresh with paint works beautifully when the bones are good.
Step-by-Step: How to Paint Kitchen Cabinets
Step 1: Remove Doors, Drawers, and Hardware
Start by removing all cabinet doors, drawer fronts, and hardware. Use a screwdriver to take off the hinges, handles, and knobs. Place all screws and small pieces into a labeled bag so nothing gets lost. Use painter’s tape to number each door and mark where it came from. This makes reassembly much easier later.
Step 2: Clean Everything Thoroughly
Grease and cooking residue build up on cabinets over time. If you skip this step, paint will not stick properly. Mix warm water with a degreaser or a few drops of dish soap, and scrub all surfaces including panels, edges, seams, and corners. Let everything dry completely before moving on.
Step 3: Fill Holes and Sand the Surfaces
Use wood filler or putty to patch any holes, dents, or surface damage. Once dry, sand all cabinet surfaces with 100 to 150-grit sandpaper. You are not trying to strip the old finish completely. You just need to scuff the surface enough so the primer has something to grip. After sanding, wipe away all dust with a tack cloth or damp rag.
Step 4: Apply Painter’s Tape and Protect Your Kitchen
Cover countertops, appliances, floors, and walls with painter’s tape and drop cloths. Protecting surrounding surfaces now saves a lot of cleanup later. Tape off the inside edges of the cabinet frames carefully.
Step 5: Apply a High-Adhesion Primer
Priming is the step most DIYers rush, and it is the one that matters most. A bonding primer creates the foundation for your paint to stick to. Apply an even coat of primer using a brush for recessed areas and a mini foam roller for flat panels. Let the primer dry for at least one hour, ideally following the manufacturer’s directions. For dark cabinets or major color changes, consider a second coat of primer.
Step 6: Sand Again with 220-Grit Sandpaper
Once the primer is fully dry, lightly sand all surfaces with 220-grit sandpaper. This step smooths out any drips, brush marks, or raised grain left behind by the primer. Do not sand too hard. You just want a smooth, even surface. Wipe away all dust with a tack cloth before painting.
Step 7: Apply the First Coat of Cabinet Paint
Use an angled brush for detailed areas, recessed panels, and inside corners. Switch to a mini foam roller for the flat sections. Always paint in the direction of the wood grain. Apply thin, even coats rather than one thick coat. Thin coats level out better and dry more evenly.
Let the first coat dry fully, usually 24 to 48 hours depending on your paint product. Do not rush this step.
Step 8: Sand Lightly and Apply a Second Coat
Once the first coat is dry, do a quick, light sand with 220-grit sandpaper to smooth out any imperfections. Wipe away dust and apply your second coat of paint the same way you applied the first. Two coats give you full coverage and a more durable finish.
Step 9: Allow Proper Cure Time Before Reassembly
This is where patience pays off. Even if the paint feels dry to the touch, it takes time to fully harden. Wait at least 24 hours before reattaching doors, and ideally two to three days before putting things back in the cabinets. Rushing this step can cause the paint to scratch, smudge, or stick when doors close.
Once fully cured, reattach the doors, reinstall drawer fronts, and put the hardware back on. This is also a great time to upgrade old knobs or pulls for a fresh look.
Must Read: How to Remove Tonsil Stones at Home
Best Paint Finish for Kitchen Cabinets
Choosing the right sheen matters as much as choosing the right color. Here is a simple comparison:
| Paint Finish | Durability | Ease of Cleaning | Best For |
| Semi-Gloss | High | Very Easy | Most kitchen cabinets |
| Satin | Medium-High | Easy | Modern or transitional kitchens |
| Gloss | Highest | Easiest | Contemporary, bold looks |
| Flat/Matte | Low | Difficult | Not recommended for cabinets |
Semi-gloss acrylic enamel or alkyd hybrid paint is the most popular choice for kitchen cabinets. These paints are tough, resist moisture, and wipe clean easily.
Pro Tips for a Smooth Cabinet Paint Job
- Always work in a well-ventilated space to speed up drying and reduce fumes
- Lay cabinet doors flat while painting to avoid drips
- Use a foam roller on flat surfaces to reduce brush marks
- Apply thin coats rather than one thick coat
- Do not skip the sanding step between coats
- For laminate cabinets, always use a bonding primer designed for slick surfaces
DIY vs. Hiring a Professional
| Factor | DIY | Professional |
| Cost | $100 to $300 | $1,000 to $3,000+ |
| Time | 3 to 5 days | 1 to 2 days |
| Finish Quality | Good with care | Excellent |
| Equipment Needed | Basic tools | Spray equipment |
If your cabinets are in great shape and you have the time, DIY is absolutely worth it. If you want a factory-smooth spray finish or you have a large kitchen with many cabinets, hiring a pro may save you headaches.
Frequently Asked Questions
Do I need to sand cabinets before painting?
Yes. Light sanding with 150-grit sandpaper helps the primer grip the surface and leads to a longer-lasting finish.
What is the best paint for kitchen cabinets?
Semi-gloss acrylic enamel or alkyd hybrid paint works best. It is durable, easy to clean, and resists moisture well.
How many coats of paint do kitchen cabinets need?
Two coats of paint after one coat of primer is the standard. Some darker colors may need a second primer coat as well.
How long does it take to paint kitchen cabinets?
Plan for three to five days total including prep work, painting multiple coats, drying time, and reassembly.
Can I paint laminate kitchen cabinets?
Yes, but you must use a bonding primer made specifically for slick, non-porous surfaces like laminate to ensure the paint sticks.
Conclusion
Painting kitchen cabinets is one of the highest-impact, budget-friendly DIY projects you can take on. The key is in the preparation. Clean thoroughly, sand properly, prime with a bonding primer, and apply thin coats of quality cabinet paint.
Give the paint enough time to cure before hanging doors back up. Follow these steps carefully and you will end up with cabinets that look fresh, feel durable, and hold up well for years to come.